The bathroom is nearly finished!
We had grouted and sealed the shower tile before the wedding, but we never posted the photos...here they are!


We only took photos of the glamorous parts of the vanity building. What you're not seeing is Jesse building all the drawer boxes from scratch, the endless hours of making, then applying edge banding to all the doors and drawer fronts, the THREE rounds of sanding and applying finish, etc. Below is the first piece to receive finish. We had to do it this way because that piece was a part of the tall cabinet and needed to be finished before building the top half of the cabinet.


The top half of the cabinet has now been built:


At this point, Jesse had built and installed all the drawer boxes! Any time we finish something, we force Cheeba to test it out. She approved.

Weeks later, the edge banding, sanding and finishing of the drawer fronts and doors had been completed and they were ready to install:


 We love our tall cabinet!

All the fronts and doors have been installed, now it's time to attach the pulls! (They match our Kohler Archer bathroom suite.)

The lower cabinet on the end will be a hamper pull-out. We haven't yet purchased the hamper that will be used to design and build the pull-out, so that does not yet have a door...


Almost finished! Jesse is now drilling the shelf pin hoes in the tall cabinet.

The doors and drawers haven't been adjusted yet, but once they do, everything should line up perfectly as though the fronts were cut from one single slice of wood (because they were.)

Finished! I'll take a better picture for the blog later...
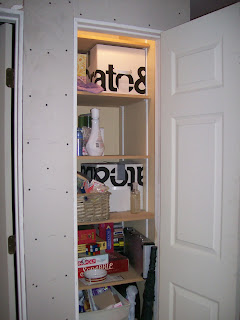
Before the wedding we also finished up the drywall and construction of our new linen closet. We're not finished sanding so we didn't want to put linens in there quite yet, though.
We also finished the drywall for our new living room wall. You'll recall that the wall was bumped out about two feet to accommodate the new master bedroom closet and linen closet (which had been removed to accommodate the larger bathroom.) If you go back a few posts, you'll find my dad and Jesse installing the header that made this all possible.

Another header success story can be seen below. There used to be a 12" beam across the top of the dining room with a sloping ceiling behind it (due to the roof line.) We installed a very large header in the attic and removed that big beam. We also created a gable so we could have a nice, flat ceiling in the dining room, complete with a chandelier above the middle of the dining room table (previously it had to be quite off-center.) I mudded and taped this myself, so please excuse the imperfections. I still have a few more seams to tape -- tomorrow!

Here you can see the new gable with the stucco lathe attached. Now we just need apply the 'scratch' and 'brown' coats before re-color coating the entire house!

Those are all the updates for now! Stay tuned for more progress!
We had grouted and sealed the shower tile before the wedding, but we never posted the photos...here they are!


We only took photos of the glamorous parts of the vanity building. What you're not seeing is Jesse building all the drawer boxes from scratch, the endless hours of making, then applying edge banding to all the doors and drawer fronts, the THREE rounds of sanding and applying finish, etc. Below is the first piece to receive finish. We had to do it this way because that piece was a part of the tall cabinet and needed to be finished before building the top half of the cabinet.


The top half of the cabinet has now been built:


At this point, Jesse had built and installed all the drawer boxes! Any time we finish something, we force Cheeba to test it out. She approved.

Weeks later, the edge banding, sanding and finishing of the drawer fronts and doors had been completed and they were ready to install:


 We love our tall cabinet!
All the fronts and doors have been installed, now it's time to attach the pulls! (They match our Kohler Archer bathroom suite.)

The lower cabinet on the end will be a hamper pull-out. We haven't yet purchased the hamper that will be used to design and build the pull-out, so that does not yet have a door...


Almost finished! Jesse is now drilling the shelf pin hoes in the tall cabinet.

The doors and drawers haven't been adjusted yet, but once they do, everything should line up perfectly as though the fronts were cut from one single slice of wood (because they were.)

Finished! I'll take a better picture for the blog later...

Before the wedding we also finished up the drywall and construction of our new linen closet. We're not finished sanding so we didn't want to put linens in there quite yet, though.

We also finished the drywall for our new living room wall. You'll recall that the wall was bumped out about two feet to accommodate the new master bedroom closet and linen closet (which had been removed to accommodate the larger bathroom.) If you go back a few posts, you'll find my dad and Jesse installing the header that made this all possible.

Another header success story can be seen below. There used to be a 12" beam across the top of the dining room with a sloping ceiling behind it (due to the roof line.) We installed a very large header in the attic and removed that big beam. We also created a gable so we could have a nice, flat ceiling in the dining room, complete with a chandelier above the middle of the dining room table (previously it had to be quite off-center.) I mudded and taped this myself, so please excuse the imperfections. I still have a few more seams to tape -- tomorrow!

Here you can see the new gable with the stucco lathe attached. Now we just need apply the 'scratch' and 'brown' coats before re-color coating the entire house!

Those are all the updates for now! Stay tuned for more progress!


WOW! You guys are amazing! Wedding check! House renovation check! Amazing couple check!
ReplyDeleteXOXO Jes
This comment has been removed by the author.
ReplyDelete